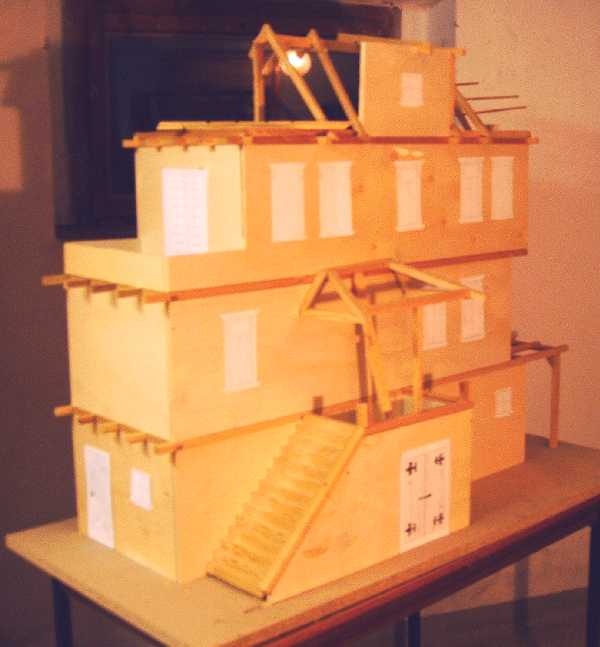
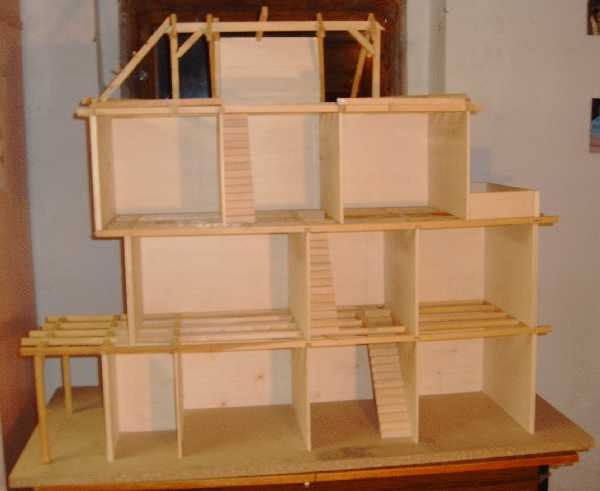
It is possible to make your own large dollhouse on a budget. Just take a simple box shape, add a lot of creativity, and turn it into a mini mansion. Take a look at this Mini Mansion project. Click the buttons at top of Mini Mansion page for DETAILS and FLOORPLAN.
Showing posts with label construction. Show all posts
Saturday, November 20, 2010
Mini Mansion Built from Scratch
Saturday, November 13, 2010
How I Made the Bathroom Fixtures- Toilet
![]() |
| Bathroom, finished |
In the $5 dollhouse, everything in the bathroom was made from scrap wood and found items. This dollhouse is for a 4 year old child with even younger siblings, so everything has to be sturdy and kid-safe. No tiny or dainty, fragile fixtures here! ;-) See previous posts for how to make flooring, sink and tub. Floor tiles, towels and door between bathroom and bedroom were all printed out and glued on. The baseboard trim and window trim is cut from white craft foam.
The toilet was a challenge. How do you make a modern toilet from a piece of wood, short of being a master carver? I guess I could have modeled it out of air-dry or polymer clay, but I didn't think of that until after I finished making the one shown below. But this came out OK and was quick and easy. Next time I'll do better. Maybe I'll make a new one out of clay when they're a little older. *G*
The bottom, base, of the toilet is a miniature wood flower pot. It was just the right scale! The toilet llid is a ready-made wood disk. The tank is a small rectangular block of basswood. I drilled a small hole on one side of flower pot and a matching hole in bottom of tank block. A sturdy wire was threaded thru the holes and bent to connect the 2 parts. Before glueing, the bendy piece of a flex-straw was added to cover the wire. Everything was painted white and a flush handle was painted on.
How to attach the lid was a challenge. I thought it might be fun if the kids could lift the lid....but that wouldn't happen if it was glued on. After attempting a few different things, I ended up using a couple of pieces of scrap magnetic vinyl. One piece was glued to flower pot as the toilet seat, the other piece was the hinge and also glued to the lid. To make the hinge work, the wire that connects the base to the tank was passed thru the hinge before straw was added. Now the lid open and closes magnetically. How fun is that! LOL
Stay tuned ....almost finished with this project!
Saturday, October 16, 2010
Another Michaels Hutch-Bash
This time one of those great $1 hutches has been turned into a laundry room wall cabinet by Doreen at Doreen's Miniature Projects. Finished cabinet is shown above and the original hutch shown below.
This is how it looks in the finished laundry room. Well done Doreen! Visit her blog to read more about this Sewing and Laundry Room Project.
Thursday, October 14, 2010
Travel Trailer Project
Today I came across this 'work in progress' at Jenn's Mini World that I just had to share! She has step-by-step photos showing how she created this mini travel trailer following instructions from Miniature Collector magazine. I love those 'romantic' old trailers and always wanted one myself, but maybe I can make one in miniature! ;-) This is a half-inch scale project.
Go here for Part One for lots of pics, plus some tips for making the project
Part Two includes Helpful Hints (Or, what I learned the hard way)
Part 2.5 Note about error in design
Part 3 and Finish Showing finished interior & accessories
Labels:
construction,
half-inch scale,
how-to,
travel trailer
Tuesday, October 12, 2010
How Dollhouse Kits Are Made
Video tour of factory at "Real Good Toys", makers of some very fine dollhouse kits. Video shows assembly of a deluxe dollhouse and the process and machinery that makes all those detailed parts!
Thursday, September 9, 2010
Which glue should I use?
The best glue for the job depends on what materials are being glued to what. Check out this new "glue tool" from Michaels and narrow your search to the most appropriate glues or adhesives specific to your project.
Enter your 2 materials into the widget and the results will show you a photo of the product along with a detailed description and usage tips! Cool, huh?
Subscribe to:
Posts (Atom)