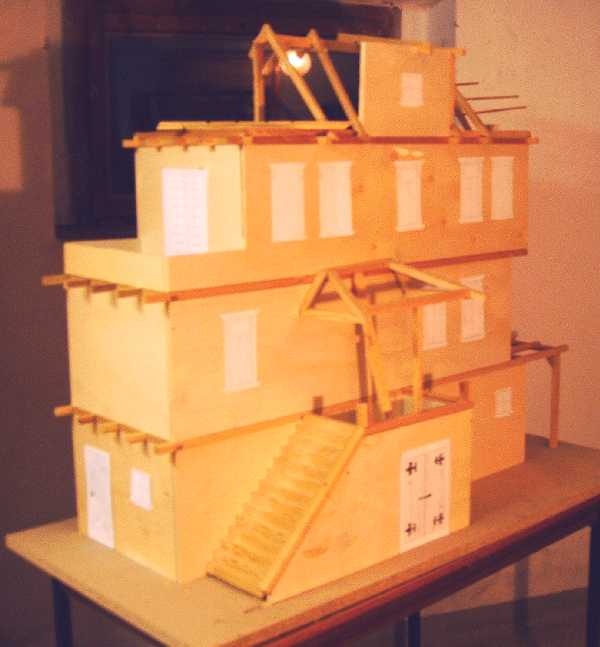
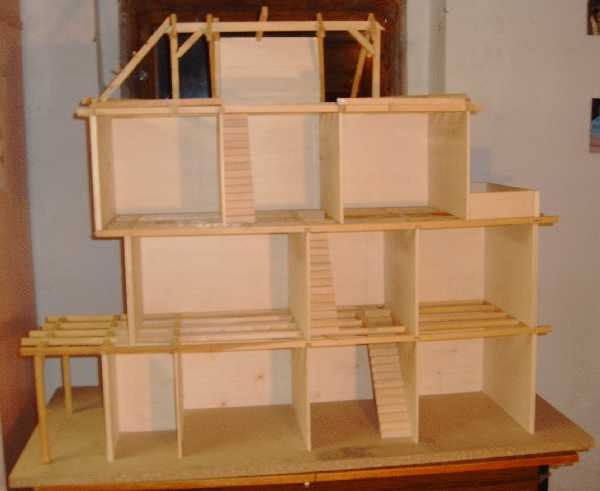
It is possible to make your own large dollhouse on a budget. Just take a simple box shape, add a lot of creativity, and turn it into a mini mansion. Take a look at this Mini Mansion project. Click the buttons at top of Mini Mansion page for DETAILS and FLOORPLAN.
Saturday, November 20, 2010
Mini Mansion Built from Scratch
Saturday, November 13, 2010
How I Made the Bathroom Fixtures- Toilet
![]() |
| Bathroom, finished |
In the $5 dollhouse, everything in the bathroom was made from scrap wood and found items. This dollhouse is for a 4 year old child with even younger siblings, so everything has to be sturdy and kid-safe. No tiny or dainty, fragile fixtures here! ;-) See previous posts for how to make flooring, sink and tub. Floor tiles, towels and door between bathroom and bedroom were all printed out and glued on. The baseboard trim and window trim is cut from white craft foam.
The toilet was a challenge. How do you make a modern toilet from a piece of wood, short of being a master carver? I guess I could have modeled it out of air-dry or polymer clay, but I didn't think of that until after I finished making the one shown below. But this came out OK and was quick and easy. Next time I'll do better. Maybe I'll make a new one out of clay when they're a little older. *G*
The bottom, base, of the toilet is a miniature wood flower pot. It was just the right scale! The toilet llid is a ready-made wood disk. The tank is a small rectangular block of basswood. I drilled a small hole on one side of flower pot and a matching hole in bottom of tank block. A sturdy wire was threaded thru the holes and bent to connect the 2 parts. Before glueing, the bendy piece of a flex-straw was added to cover the wire. Everything was painted white and a flush handle was painted on.
How to attach the lid was a challenge. I thought it might be fun if the kids could lift the lid....but that wouldn't happen if it was glued on. After attempting a few different things, I ended up using a couple of pieces of scrap magnetic vinyl. One piece was glued to flower pot as the toilet seat, the other piece was the hinge and also glued to the lid. To make the hinge work, the wire that connects the base to the tank was passed thru the hinge before straw was added. Now the lid open and closes magnetically. How fun is that! LOL
Stay tuned ....almost finished with this project!
Wednesday, November 10, 2010
How I Made the Bathroom Fixtures- Tub
![]() |
| Finished Bathroom |
The bathroom is now finished. All fixtures were made from wood. The baseboard molding and the molding around the door and window is white fun foam. Making the flooring and sink was discussed in a previous post. The door between the bathroom and bedroom is a printable.
The tub is a block of wood, about 1.5"x2"x5". The interior of tub was routed out (by a friend...not me) and all edges were softly rounded by sanding. The first photo below shows tub after being primed. Hot and cold faucet knobs (child safe) were made by embedding dowels at end of tub.
Tuesday, November 2, 2010
How I Made the Bathroom Fixtures-Sink
![]() |
| Finished Bathroom |
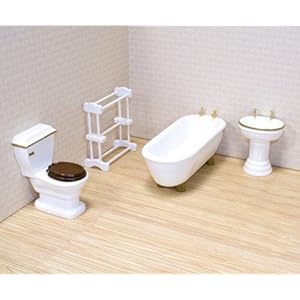
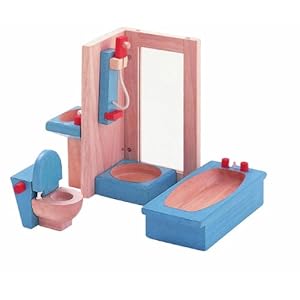
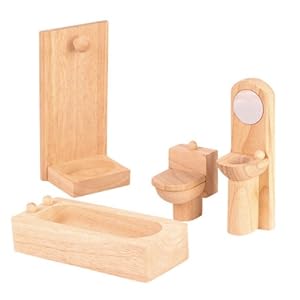
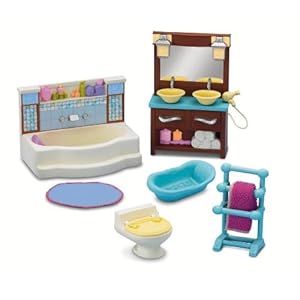
The 2 main goals of this dollhouse project is to spend as little as possible and to make it child safe....all while making it fun and realistic, of course! The $5 dollhouse is a gift for 4-year old granddaughter, but I have to keep in mind that she has a couple of younger sisters who will undoubtedly handle the furnishings. So "clunky and sturdy" is the name of the game for the bathroom fixtures. If that's not a concern for your dollhouse, you might like one of these sets, all designed for children.
This Melissa & Doug Bathroom Furniture Set
is recommended for ages 6-10. I think it's scaled nicely enough for an adults hobby!
Plan Toys
has a couple of wooden bathroom sets suitable for ages 3-8.

Fisher Price
has a plastic bathroom set. Recommended for ages 3-7.
Although there's quite a few bathroom sets available to purchase in 1" scale, most of them are either too fragile for my younger grandchildren or too expensive for child's play.....so I opted to make some out of wood.
![]() |
| Bathroom sink-unpainted |
The photo above is the unpainted rough beginnings of the sink. It is simply a block of wood about 3"x3" and 1.5" thick. I added a couple rectangles of basswood to represent doors and gouged out a round "sink" in the countertop. The faucets are 2 small pieces of dowel inserted in wood next to sink. It looks real enough once painted. Let the kids imagination fill in the blanks! LOL
![]() |
| Bath sink and cabinet |
The photo above shows the finished sink along with a wall cabinet and some faux towels. The faucets were painted silver and the countertop painted pink with a multi-color splatter technique (used an old toothbrush to splatter various colors). Both the sink and countertop were top coated with a high gloss finish to add a little to the realism.
The wall cabinet was rescued from the original dollhouse. It was missing a door! Made a new door from basswood and painted it all white. I had a small piece of very shiny silver vinyl in my stash of stuff and used that for "mirrors". The towels hanging on the wall are a printable set of towels glued on.
Oh...and the cabinet doors open and close with hinges made from tiny nails. A nail is inserted in top of cabinet, going all the way thru and nailed into the top of door near edge. Another nail is goes thru bottom of cabinet into bottom of door. Works swell and is completely embedded in wood so should be safe.
In the above photo you can also see the finish molding around the window and the baseboard. All moldings were made with white "fun foam" cut to size. Much easier than cutting & painting wood and it looks surprisingly nice!
Next we'll make the tub!
Sunday, October 31, 2010
Bathroom Finishing
![]() |
| Bathroom-before flooring added |
Not much to show in this small bathroom. This room was papered with real-life wallpaper that I just happened to have a large enough sized sample. Very, very little was left over! It was close! LOL The scale of the pink & blue print was just right for the dollhouse and also goes nicely with the pink bedroom!
![]() |
| Bathroom with printable flooring |
The bathroom floor is a printable tile design that I made to match pink in wallpaper. I covered the ink-jet printout with clear vinyl shelf paper ("Contact" paper) to give it a tile-look sheen. Before cutting out the flooring from printout, I made a paper pattern using brown craft paper.
![]() |
| Use your graphics program to alter color of this pattern to suit your own room and then fill a full sheet of paper to print. |
To make the pattern: Cut a piece of craft paper a little larger than the estimated size of room and place it on floor. Then take a stylus (or a not-too-sharp pencil) and emboss or rub a mark all around the edges where floor meets wall. Before removing paper from room, mark the paper with an arrow to indicate back wall, so you'll know which end is which when you remove paper. Believe me, top-bottom-front-back CAN get mixed up!! Next, cut out the pattern based on that mark and fit it into the room. Any places that don't fit exactly can be patched with a scrap of paper taped onto pattern and re-cut. Make sure you have a well-fitting pattern before cutting your flooring. This is especially important if you've purchased a $10 pack of dollhouse flooring and don't want any mistakes! *G*
Also, remember to place pattern on flooring with the correct side UP. Turn your flooring material over and trace your pattern onto the back side of your flooring .....making sure the pattern is also upside down. I'll be glad to answer any questions about making your own tile pattern...just ask!
Labels:
carpet-flooring,
how-to,
interior,
printables,
wallpaper
Wednesday, October 27, 2010
Decorating the Playroom
The top floor of the $5 dollhouse has height limitations due to the gable roof. I decided to decorate this as a generic playroom so granddaughter could use it in many different ways, not just as bedroom. This room was decorated at practically no cost. I also made some furnishings for it at little cost, which I'll show later.
The floor in this room of the original $5 dollhouse was in very bad shape with old glue and other things stuck to it. I could have covered it in carpet, I guess, but I wanted a wood floor here.
Instead of trying to sand and fix the original floor, I used a piece of thin plywood to cover up the original floor. Before giving it an acrylic finish, I used a pencil to draw lines to represent the gap between floorboards. Photo here shows vertical lines added. Randomly spaced horizontal lines would be drawn to represent the length of each board. You could also make the width of each board more random than I did. Additionally, if you like, you could add a couple of dots at end of each board to represent the nail heads in a more rustic floor.
Once the wood is coated with an acrylic finish, the pencil lines & indentations make it look like real flooring. Be sure to use a ruler and measure for accurate straight lines! ;-)
Tip: I made a paper pattern first before cutting plywood for floor. This gives exact dimensions, especially when room isn't perfectly square. You could use a brown paper grocery bag to make pattern.
I didn't glue this floor down. It fit well enough where glue wasn't needed. Also, by not being glued down the wood floor could expand and contract with the humidity and hopefully, avoid any problems.
Because the floor wasn't glued down, I removed it to paint and wallpaper.
I found a 'Dora the Explorer' wallpaper border printable that was the exact same height as the short wall in the room. I think I found it at Jennifer's Printables ...I'll have to check and get back to you on that!
All kids love Dora, so I settled on that. The walls were painted a corresponding blue using Americana
Craft Paint. It required a couple of coats!
![]() |
| Photo shows close-up of wallpaper border (and also some of the bumps and gunk on the original floor!) |
I stumbled upon a printable of a small hexagon window and thought it would fit well on the back wall. After I printed out the window, it was sprayed with a fixative so ink wouldn't bleed when I glued it. Also, it was glued to a piece of cardboard first, just to give it a little dimension. Finished room is below.
Labels:
how-to,
interior,
priming-painting,
printables,
wallpaper
Saturday, October 16, 2010
Another Michaels Hutch-Bash
This time one of those great $1 hutches has been turned into a laundry room wall cabinet by Doreen at Doreen's Miniature Projects. Finished cabinet is shown above and the original hutch shown below.
This is how it looks in the finished laundry room. Well done Doreen! Visit her blog to read more about this Sewing and Laundry Room Project.
Subscribe to:
Posts (Atom)